Repotting a plant can seem like a difficult task because a lot of things can go wrong – you can damage the plant by removing it incorrectly from its old pot or fail to repot it correctly and therefore cause the plant to die. Knowing how to prepare a new pot, remove the plant from its old pot, and prepare the plant for its new pot can make repotting a plant a lot easier.

General Rules
First things first: repotting does not necessarily mean changing a plant’s current planter, but rather, changing its soil or potting mix. Fresh soil means new nutrients. This is great news if you love your current planter, but if you’re looking to purchase a new one that’s fine, too.
Soil
If you’re unsure which type of potting soil to buy, selecting one that consists of coarse-fibered peat moss (70 percent) combined with a high percentage of perlite (30 percent). You’ll recognize perlite as the tiny, roundish white specks which introduce air into the soil amid the other components.
Pot
When you’re repotting your plant, you don’t necessarily need to move it to a bigger one. Sometimes your plant’s potting mix just needs to be refreshed to provide it with new nutrients. But if your plant is getting too big for its pot, choose a new one that’s only a little bigger. If you choose a pot that’s too big, you run the risk of overwatering and root rot (the most common killer!), which is more likely when a plant is swimming in potting mix.
Instead of repotting your plant directly into a decorative pot, keeping it in a plastic grow pot—like the kind it had when you bought it—and placing that into your fancier container. That way, the plant has proper drainage. If you’ve had drainage problems in the past, she says you can also choose a taller pot over a shorter option.
If you are changing planters, try to keep the size no more than 3" larger in diameter for tabletop planters, and no more than 6" larger in diameter for floor planters. If you're repotting a very small plant, your new planter might only need to be an inch larger! The size is important here because typically when we move our plants to a larger pot with more soil, we will be inclined to water more often. A small plant + an oversized planter + lots of soil + lots of water = accidentally killing with kindness. You do not want your plant to be swimming in soil, but rather, have a little extra room to grow into for the year ahead.
Plants typically need to be repotted every 12 to 18 months, depending on how actively they are growing. Some slow growers can call the same pot home for years, but will just require a soil replenishment. Early spring, before the start of the growth season, is usually the best time to re-pot your houseplants.

Repot Reasons
Here's a short list of reasons to repot your greenie:
- The roots are growing through the drainage hole at the bottom of the planter.
- The roots are pushing the plant up, out of the planter.
- Your plant is growing slower than normal (different than winter dormancy).
- The plant is extremely top heavy, and falls over easily
- It dries out more quickly than usual, requiring more frequent waterings.
- The aboveground parts of your plant take up more than three times the pot space.
- Noticeable salt and mineral build up on the plant or planter.
What You Need to Repot
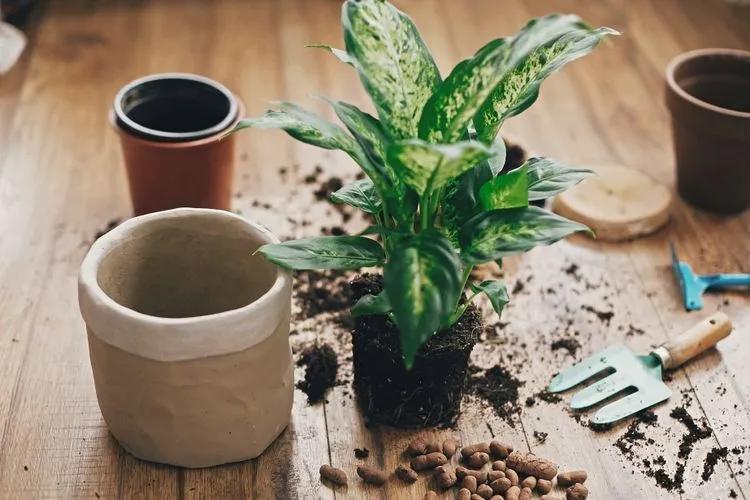
Grab everything you'll need:
- Your new houseplant, of course
- The planter you're potting into
- Fresh potting mix
- Lava rocks or something similar (if your planter does not have a drainage hole)

How to Prepare
When you’re selecting a new pot, make sure it has drainage holes to allow excess water to drain. Even if you select a pot that is the correct size, you still don’t want water sitting in the bottom of it and causing root rot.
Clean and disinfect the pot. It’s important to disinfect old pots before reusing them, as they can accumulate minerals or other debris that are detrimental to plant growth. Mineral salts, for example, can dehydrate your plant and keep it from flourishing. Other debris can harbor disease-causing organisms.
To disinfect your pot, soak it in a solution containing one part bleach and nine parts water for at least ten minutes. Place it in a solution of water and dish detergent and then rinse.
To clean mineral deposits and debris from a steel pot, use steel wool or a wire-bristle brush to scrub them away. Plastic pots only need a scrubbing pad. You can scrape off any remaining deposits with a knife.
Once you’ve cleaned the pot, rinse it with water and then soak it until ready for use.
Soak the new pot. If you decide to use a terra cotta pot for repotting, make sure you soak the pot in water for a few hours before you begin the repotting process. Terra cotta is pretty porous, which means it soaks up water easily. You don’t want your pot stealing your plant’s water.

Repot Steps
Remove the Plant From the Current Pot
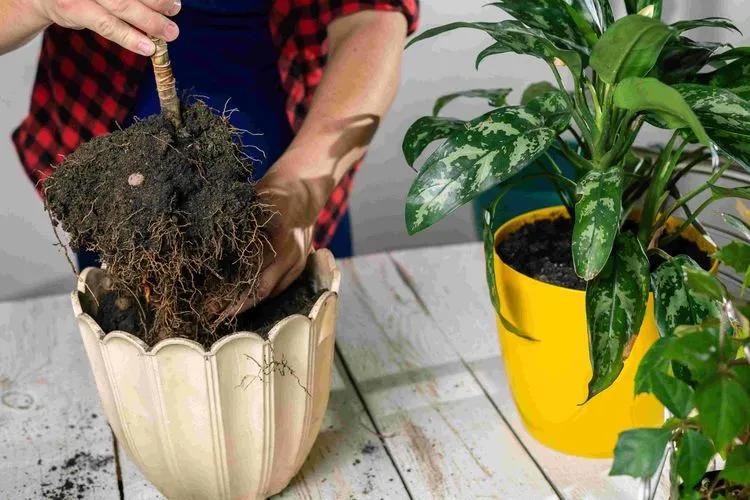
Turn your new plant sideways, hold it gently by the stems or leaves, and tap the bottom of its current pot until the plant slides out. You might need to give it a bit of help with a couple gentle tugs on the base of the stems. Your plant will come out of its old pot more easily if the rootball is moist. You’ll want to water the plant a few hours before you want to repot it. This will help it maintain its health even if it loses a root or two during the repotting.The rootball is the part of the plant that extends into the actual pot. It’s made up of roots and soil and often keeps the shape of the pot after it’s removed.
Loosen the Roots
Loosen the plant’s roots gently with your hands. You can prune off any threadlike roots that are extra long, just make sure to leave the thicker roots at the base of the foliage. If your plant is root bound – the roots are growing in very tight circles around the base of the plant – unbind the roots as best you can and give them a trim.
Remove the Old Potting Mix
Remove about one third or more of the potting mix surrounding the plant. As it grew, your plant removed some of the nutrients in the current mix, so you'll want to give it fresh mix if you're potting it anyway!
Add the New Potting Mix
Pour a layer of fresh potting soil into the new planter and pack it down, removing any air pockets. If your new planter doesn’t have a drainage hole, layer the bottom with lava rocks or similar (rocks, gravel, etc.) before adding the potting mix. The goal is to create crevices for the extra water to pool into, away from your plant’s roots.
Add the Plant
Set your plant that you removed from the grow pot on top of the fresh layer of mix in the new planter, making sure it's centered, then add potting mix around the plant until it is secure. Once you’ve placed the plant in the new pot, you’ll want to put soil into the pot around the rootball. Don’t overfill the pot - the soil line should be about 1” below the top of the pot.
You can “stuff” or “fill” when you’re adding new soil. “Filling” just means pouring soil in, around, and on top of the rootball. “Stuffing” means pouring the soil in and then pressing it down. You might want to “stuff” the pot for a top-heavy plant, because it will help you keep the plant steady and even.
Water and Enjoy
Even out the potting soil on top, water well, and enjoy! Once your plant is in its new pot and you’ve filled the pot with soil, water the plant. It will help the plant’s roots soak up the nutrients from the soil and ensure that the plant takes to the new pot.
You might need to add more soil to fill in empty spots once you water the new plant and the soil settles.
When plants get too crowded, many can be divided to free up space and make new plants! Re-potting time is the ideal moment to take advantage and divide offshoots and pups into self-sufficient plants.
Reminder: If your plant is stressed, wait to re-pot! For example, if it’s wilted from thirst, best to soak it and allow the plant to perk back up before re-potting. Likewise, try to avoid re-potting in extreme weather, like heat waves, which can add stress.
Most potting soil contains fertilizer. To prevent from over-fertilizing and damaging your plant, you can hold off on fertilizing for about 6 weeks after re-potting.

After re-potting or potting up, plants tend to enter a period of shock. Don’t worry – it’s normal! Plants may appear wilted and thirsty, but take care to refrain from watering until about a week after re-potting to ensure that any roots damaged during re-potting have healed. During the recovery period, place plants in a cooler, shadier spot.
FAQ
What Should You Not Do When Repotting?
When repotting, avoid pots without drainage or ones that are way bigger than the old one (more than 2 in (5 cm)). Don’t pack the soil too hard, bury the plant too deep, or fertilize right away. Your plant needs time to settle in and recover.
